Firmware Upgrades on an F5 BIGIP
Overview
An F5 BIGIP is a complex device with many features over and above such mundane tasks as load balancing so the need for frequent firmware upgrades is hardly surprising and should therefore be treated as a routine maintenance task. As with all routine maintenance tasks, the firmware upgrades should be scheduled for a time of low network utilisation in order to minimise any interruption to your beloved end user. Allow about an hour per BIGIP to install an image or hotfix and run a pre-flight qkview diagnostic. It should not take more than 30 minutes per BIGIP to perform the actual upgrade.
Prerequisite Tasks
Ensure that you have all the serial numbers and licence keys to hand before starting the upgrade process. The serial number of the units will be in the format f5-XXXX-XXX. The base licence for the unit will be in the format XXXXX-XXXXX-XXXXX-XXXXX-XXXXXXX and any feature licences will be in the format XXXXXXX-XXXXXXX. Normally, these will not be needed but, as strange things sometimes happen when you least expect them, these keys would then be needed to reactivate the licence.
Ensure that you have access to the Internet. Should reactivation be needed, access to the F5 website will be necessary and most BIGIP units will usually be deployed in a data centre where direct access to the Internet from the BIGIP management interface might not be possible.
If you middle names are “Air” and “Bag” then run a diagnostic using qkview and upload it to ihealth.f5.com for analysis as well. Correct any issues, such as failed disks, before proceeding. Don’t laugh as it is perfectly possible that those who are paid to monitor the BIGIP might have turned off all the logging because all those pesky SNMP alerts were interrupting their nap time.
On both BIGIPs, upload the iso file (System -> Software Management -> Image List -> Import) for the new version and apply it to an inactive bootable partition that currently has the oldest version of firmware installed. Then install any current hotfix for the new firmware version (System -> Software Management -> Hot-Fix List -> Import). The procedure is the same for both images and hotfixes. Note that, in the interests of common sense, the F5 will not permit you to install images or hotfixes to the active partition.
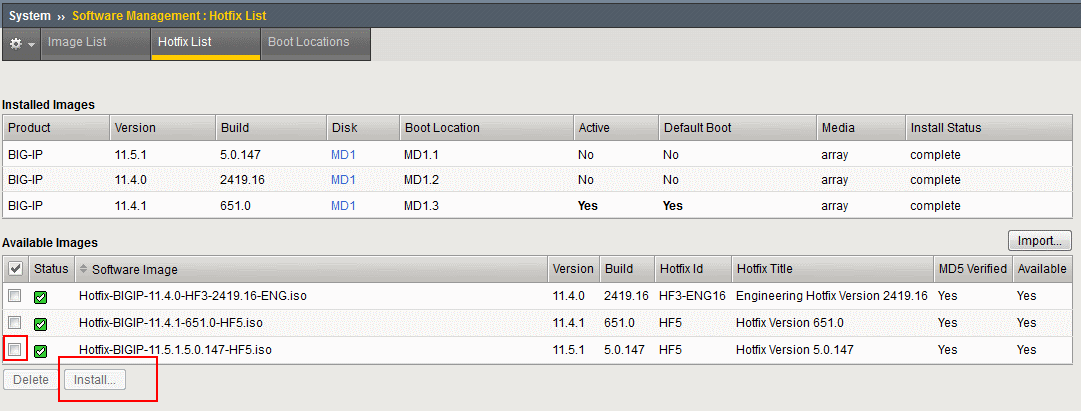
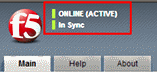
Now verify that all the units that are to be upgraded are in synchronisation.
Then take a backup of the current configuration on all the units. This is important as, without psychic abilities, it is unlikely that you will be able to guess which unit is going to fail so you have to prepare for the worst. Then save a copy of the configuration to your local computer for, at some random point in time, you will find yourself needing to edit that configuration file manually just so you can get your precious BIGIPs to work again.
Doing The Deed
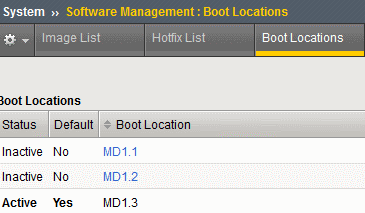
For the purposes of this example, we will assume that you have two BIGIPs running as an active/passive cluster so we will upgrade the passive BIGIP first. Go to System -> Software Management -> Boot Locations and select the inactive boot location that contains your new image and any installed hotfixes.
Click Activate on the hot-fix installation
Reboot the unit and make yourself a cup of tea. If all goes well then the unit will restart – this can take 20 minutes especially if there are any firmware updates in the new version - and all will be well. Check the system logs (System -> Logs -> Local Traffic) and ensure that the configuration has loaded correctly and that there are no licensing activation errors. If there are errors, either correct them, contact F5 support, check Jobserve for new opportunities or panic as best suits your mood.
On the Active unit, you can now fail over your cluster to your newly upgraded BIGIP by selecting Force to Standby.

On the newly upgraded, and now hopefully active BIGIP, check the system logs (System -> Logs -> Local Traffic) and verify that failover has been successful. You should see all those monitors that you so lovingly designed come to life thus indicating that all the virtual servers are now active.
Repeat the activation process for the bootable [partition on the other, now passive, BIGIP and reboot. After the reboot, check the system logs (System -> Logs -> Local Traffic) for any licensing or configuration errors and verify that both BIGIPs are back in synchronisation.
Job done and it's not even dawn.